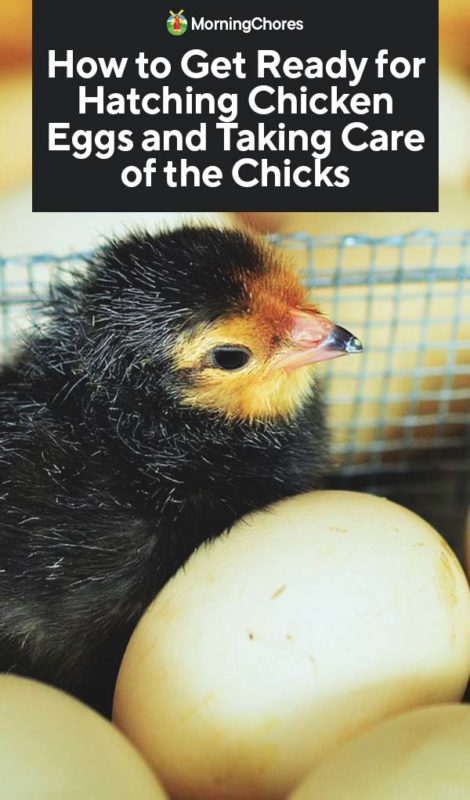
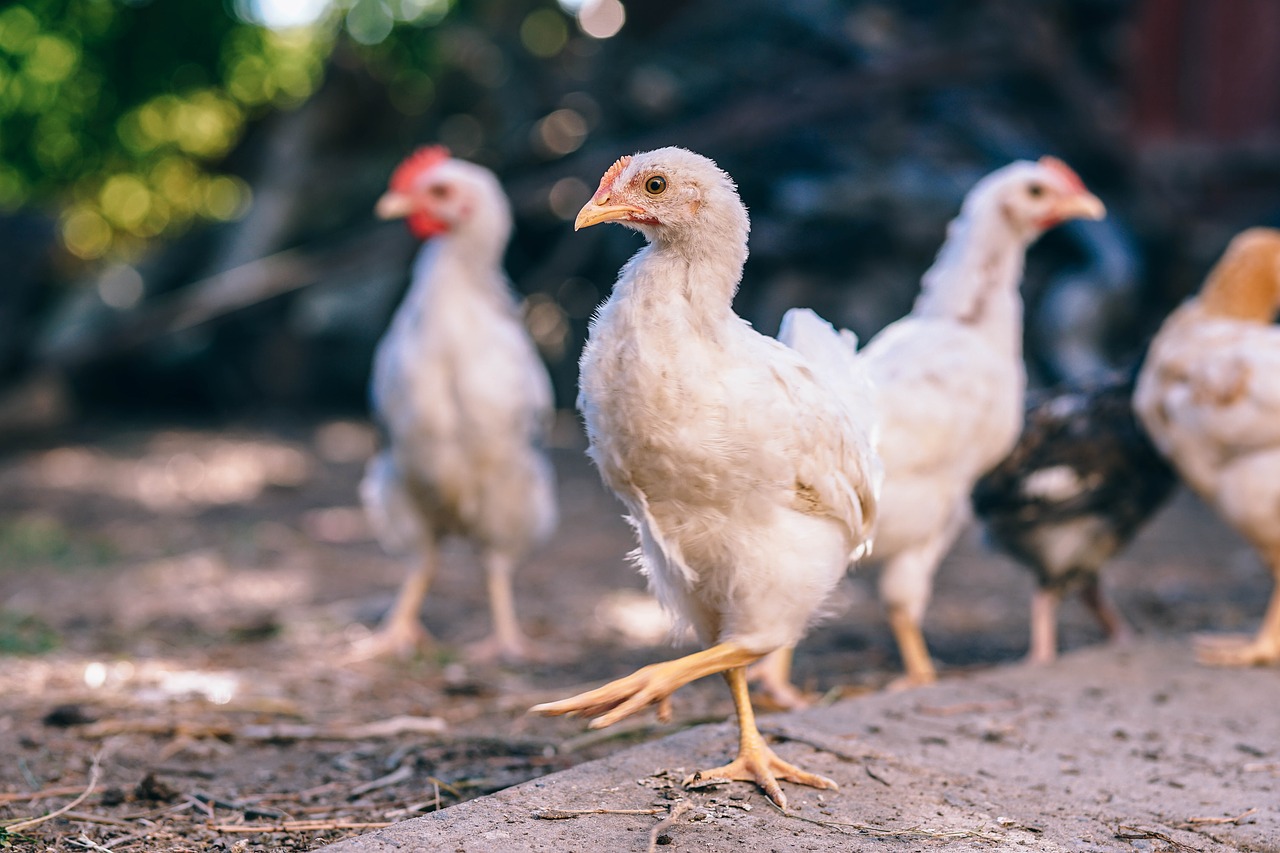
How to Take Care of a Chicken Egg How to Make a Baby Chicken From an Egg
If you buy an item via links on this page, we may earn a commission. Our editorial content is not influenced by commissions. Read the full disclosure.
Which came first, the chicken or the egg? Let's take a simplified view:
If you are a new owner of backyard chickens, you would declare that you bought your chickens first, and now you are waiting for your first eggs – hence, the chicken came first.
Or, you could venture into incubating fertilized eggs, in which case you would declare that the egg came first! On your homestead that is.
Regardless of which option you chose, we will be discussing everything from mating chickens, incubating eggs, hatching, and rearing the brand new chicks.
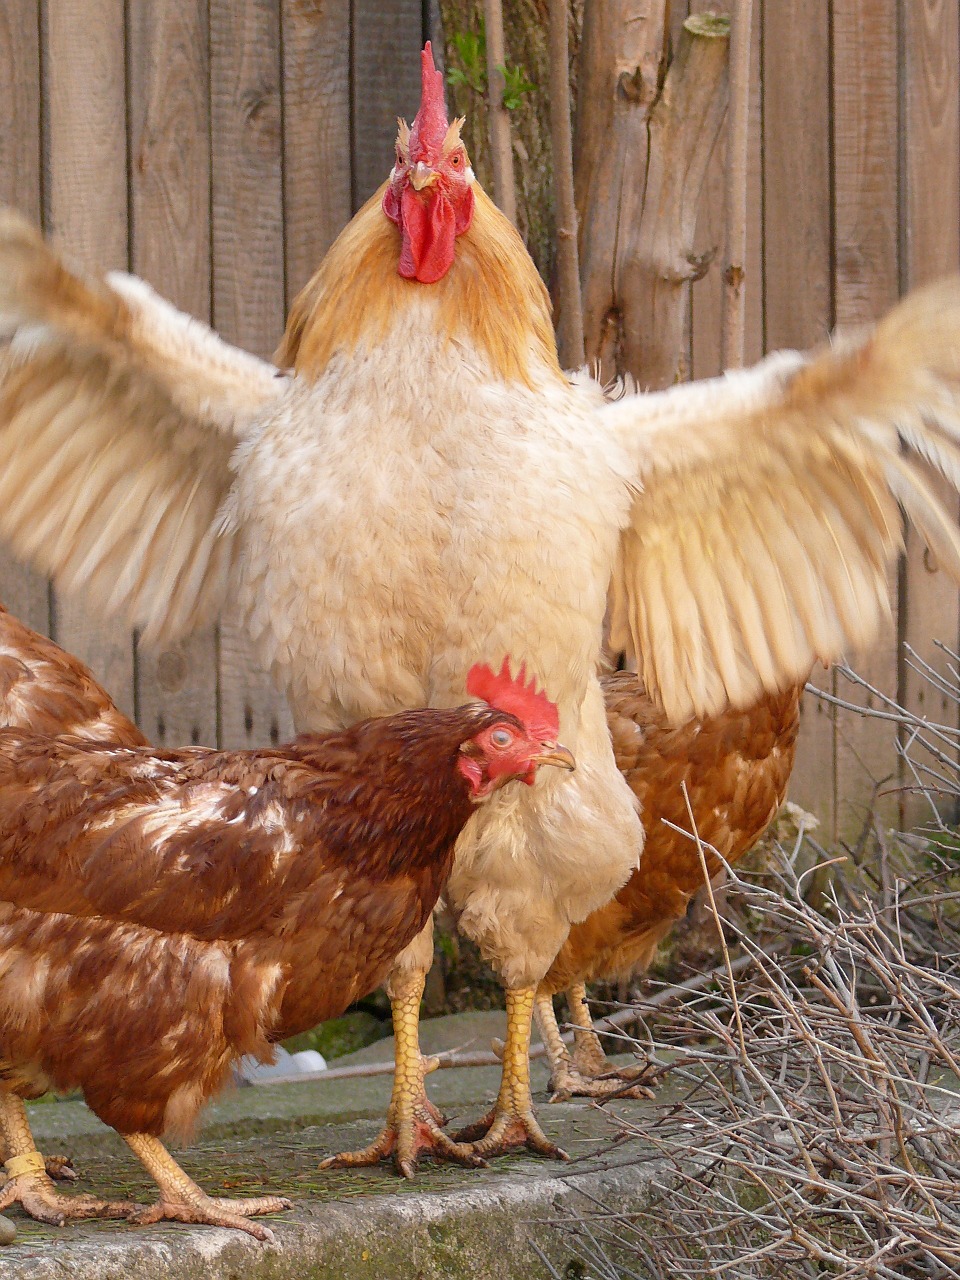
Mating Chickens: What You Need to Know
If you want to know the perfect time when you can let the rooster and chicken be by themselves, then like all female animals, a chicken hen is ready when it's ovulating. And you would know this when it's laying eggs!
A rooster of around 5-6 months old can be sexually mature. You may want to keep the ratio of the flock around 10 hens per rooster. This will see to it that the rooster maintains its fertility and that the hens do not sustain any injuries from overbreeding.
The rooster you get hold of should belong to a good breed. Its eye color, as well as feet, should be free of any deformities.
For the mating and breeding season to start, it's best to wait until spring. Although chickens can be bred any time of the year, the ones which are bred in spring, tend to be stronger. You merely have to introduce the rooster to your flock and let nature take care of the rest.
For mating to produce the best results, ensure that both the hen and the rooster have a good quality feed as this will see that their reproductive systems are in the best of health.
Also, if you're breeding second or third generation chickens, be mindful of inbreeding issues. This can be taken care of by tagging the chickens so that you know which chickens are related to the rooster. Once you know, only allow the chickens you want to breed to be with the rooster.
The Mating Process
The uninitiated may not know the process even if they witness it. A rooster's sexual organ papilla is located inside the bird. When it's time to mate, the hen inverts its clocoa to meet the organ of a rooster and to let the rooster' semen enter its reproductive tract.
For this process to work, the rooster gets in the position, hitching a ride on the back of the hen, in an act known as 'treading'. Before the mating, the rooster may try to court through any of the numerous ways such as fanning to impress the hen, dancing in a circle, or picking up food while calling the hen over.
Do You Have Fertile Eggs?
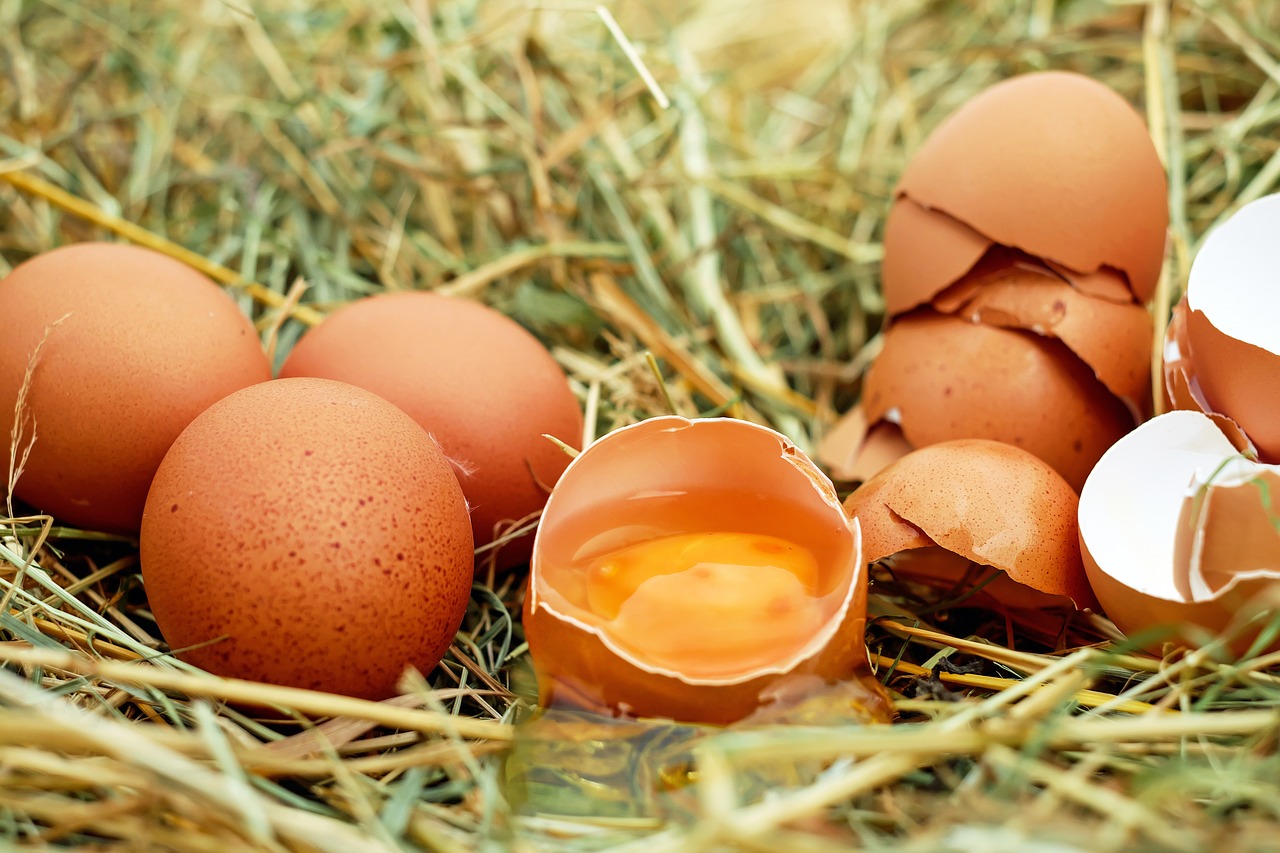
Store-bought eggs are usually not fertile. You could place an order for fertile eggs at poultry farms or the hatcheries. Or you can take eggs from your hen and check if they are fertile.
Should You Candle the Eggs?
Candling the egg is a process to learn which of the eggs are fertile and developing. It can also be used to determine if the fertilized egg has stopped developing or is in the stages of development. You illuminate the interior of the egg to see it.
However, it's not wise to candle the eggs in the early days of incubation, for the sake of seeing which eggs might hatch. That is so because the embryonic system is fragile and can be damaged by it.
At this point, what you can do is make sure that the egg is lying right side up.
Egg Candler
This is a device used to examine the contents of the egg.
A very simple gadget, an egg candler consists of an LED light. This is great for eggs as it doesn't give out any damaging heat. So, there's no probability of you accidentally cooking the eggs while you're having a glimpse of them!
You have to place it on the ground and place the egg on the solid surface. The egg candler can be held in hand too but it's better to place it on the ground for a steadier grip. The strong beam coming from the device allows you to have a good look at the eggs.
Egg candlers come in as standard candlers as well as those with high intensity. High intensity helps you to have a peek inside dark-colored eggs too. With standard candlers, it might be difficult to see inside dark-colored eggs such as the chocolaty Marans.
However, these higher intensity lights will have batteries which will run down pretty quickly so it might be a better idea to use them with rechargeable batteries.
OvaScope
This resembles a microscope in appearance. To a certain extent, it has a function like one too and it is also used to check whether an egg has been fertilized.
For this to work, you have to place an egg inside a small chamber which cuts out all the external light. The OvaScope features a mirror that magnifies the eggs. You have to peek through the eyehole at the top to see the magnified version.
This makes the process of candling darker eggs much more convenient.
Deciding on Hatching Eggs
There are 2 ways to go about hatching: Either you let nature take its course or you take matters into your own hands and go for artificial hatching.
If you let mother hen do the work, they get broody, fussing over the eggs, and hardly leave the nest. If they don't take care of this responsibility, the chicks may not hatch. Or worse, they may hatch but with deformities.
As some backyard chicken raisers opine, though, modern chickens do not make for very responsible mothers. Hence, backyard chicken keepers and farmers ditch the traditional method and get hold of the incubator to do this work by themselves. They don't leave it to chance.
Since there are 2 ways to go about hatching eggs, let's explore the natural hatching way:
1. Natural Hatching
The best way to hatch eggs is getting them hatched under the care of a broody hen. However, a broody chicken isn't something you can call a norm. Broodiness is something which some chickens have and others don't.
If you do want a broody chicken, though, one of the good alternatives out there is a breed called Buff Orpingtons. Silkie Crosses also make for good broody hens. You can breed them alongside your other chickens, or alternatively, you can purchase them from somewhere. Even so, not all the chickens from the breed of Buff Orpingtons may be broody.
Broody hens should preferably not be put together as they tend to steal each other's eggs and ruin the batches. To test out her 'patience', it's best to place a few eggs under her to see if the broody hen is serious enough about this hatching business! Once you see the hen proving herself steady, place the 'real' eggs under her.
The broody chicken should be taken once a day off from her nest for the food, water, and defecation. Be sure to do all these things at the same time daily as chickens are creatures of habit and anything going against set routine tends to make them restless. Don't disturb them too much as chickens need to feel safe. Otherwise, they can abandon their eggs due to stress.
After the 18th day, do not disturb the chicken. Do leave water and food within her reach but out of reach of any chick.
2. Artificial Hatching
Taking care of the eggs just like a mother chicken does, may not be that easy but it sure is worth the effort.
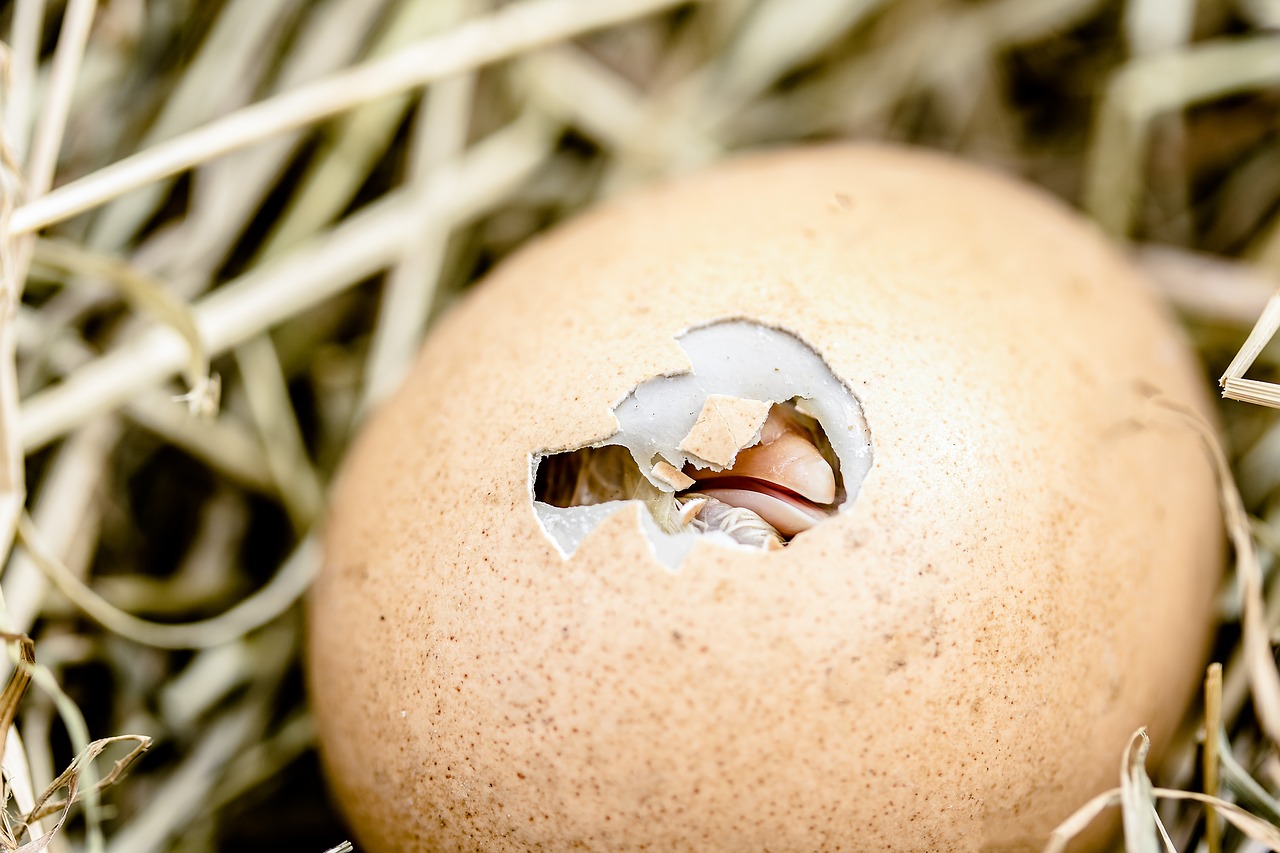
Eggs can take 21 days to hatch. Once you start the incubation, this is the normal number of days required for an egg to hatch. However, a chick may not hatch exactly 21 days after incubation. It varies from chick to chick! It can be a day too soon or late.
However, do note that if you set eggs for hatching 10 days after them being laid, the chances of them to hatch will drop significantly.
Once you lay the egg in the incubator and a day has passed, you might be thinking nothing is happening inside it. You couldn't be further from the truth. As soon as it is laid inside the incubator, its development starts. The cells inside the egg begin to divide and start developing into an embryo.
Once the chicks start pecking, they may take 1 or 2 days to hatch or may come through all at once.
How to Choose Eggs for Incubation
If you're incubating eggs, incubator space might be a constraint for you. In that case, you have to make sure that the eggs you choose are of premium quality so that your effort is not wasted.
So, if you want to buy eggs and then get them ready for hatching instead of getting eggs from your backyard chickens and incubating those eggs, it's ideal to choose eggs from breeders which:
- Are mature, healthy and well developed
- Have a high percentage of producing fertile eggs
- Are undisturbed during the mating season
Besides this, you should consider the following points too:
- Do not go for too large or too small eggs. Large eggs tend to hatch poorly while small eggs will lead to small chicks
- Do not get eggs that have thin shells or shells with cracks. These eggs will have difficulty in retaining moisture which is essential for the development of a healthy chick. Moreover, cracked eggs have an increased chance of contracting diseases
- Do not go for eggs that have an odd appearance
- Only clean eggs should be selected for hatching
Note: If you wash the dirty eggs or wipe them off with a damp cloth, you'll remove the protective coating of the eggs and expose them to dangerous microorganisms. Not only this, washing and rubbing, in fact, tend to force these harmful microorganisms inside the eggs through its pores.
How to Store Eggs for Incubation
Ideally, you would want to hatch chicks in batches, as this makes the process easier. However, that would mean you would have to collect and store fertile eggs over a short period until you are ready to incubate them.
One of the most important steps is to store the eggs properly. And if not done the right way, this can wreak havoc with the hatchability of the egg. The embryo needs proper care even before the start of the incubation, something which many egg producers and chicken keepers tend to disregard.
To ensure that you see the hatching chicks in a healthy and hygienic way, you must follow all these guidelines:
- Collect eggs thrice daily. If the temperature exceeds 85°F, increase collection to 5 times. You can break down by collecting eggs 2-3 times in the morning and collecting once or twice in the afternoon
- If you have some slightly soiled eggs with you, you can still use them. However, do not attempt to hatch using dirt eggs. Do not wash and use them as they can create problems for you
- Create a storage area which is cool-humid. Ideal conditions would require it to have a temperature of 55°F with a 75% relative humidity
- The eggs should be stored with its small end pointing downwards
- If you aren't incubating the eggs within 4-6 days, do not forget to alter their position. Turn them to a new position once a day until the time you place them in an incubator
- Up until 7 days, hatchability is still pretty good after which it starts declining at a rapid speed. Hence, if your chickens' eggs have been stored for more than 7 days, do not proceed with incubating them
- Once the eggs cross the 3-week mark, their hatchability reduces to almost nil, making the eggs useless for you. Hence, to avoid these problems, have hatching schedules ahead of time. This will sort out any storage problems as well as take care of reduced hatches
- If you have cold eggs at hand, allow some time for them to come to room temperature before you place them in the incubator. If you warm them up abruptly from 55-100°F, it will lead to moisture condensation on the eggshells which can only result in diseases and a reduced number of hatches
Important Guidelines for Incubating the Eggs
An incubator has to control the environment's humidity, temperature, and ventilation. If you have bought a commercial model incubator, be sure to follow the instructions accompanying it.
To start off the incubation process, be mindful of the following aspects:
1. Choose the Right Location to Place the Incubator
To help your incubator have a consistent temperature, place it in a location where there is the least chance of temperature fluctuation. Placing it near a window will increase its exposure to direct sunlight. This may cause fluctuation in temperature. The rising heat can be high enough to kill the delicate embryos. Connect the incubator to an electrical source and ensure that it doesn't get detached accidentally.
2. Get the Incubator Ready
Before incubating, make sure the machine is working properly. You should be well-acquainted with the process of operating it.
In the humidity pan, place warm water. Now, adjust the heat source so that the temperature stays in the range of 99-102°F. Keep checking the temperature for the next 24 hours to make sure that the correct temperature is maintained.
It's best to have a heat source with a thermostat as you can readily control the temperature. Light bulbs without a thermostat can become increasingly difficult to handle unless the room temperature stays constant.
Another thing to keep an eye out for is the temperature drop after placing the eggs. Even if the incubator was operating at the proper temperature, it will drop while you're placing the eggs inside the incubator. Do not attempt to compensate for it by raising the temperature. The time it will take for the temperature to return to normal will depend on the number of eggs as well as the size of the heating unit.
This temperature lag period can be controlled by bringing the eggs to room temperature before placing them in the incubator.
3. Set the Right Temperature
The temperature should be maintained in the range of 99-102° F. Place the thermometer above or at the level of the center of eggs.
While extreme temperatures are detrimental for embryo development, overheating is more dangerous than underheating them. Overheating can lead to speeding up embryo development and can cause abnormal embryos.
A short cooling period doesn't wreak havoc but long spells of chilly temperatures can reduce the rate at which embryos are developing and too low a temperature can kill the embryos. Avoid going below 97°F or above 103°F.
4. Maintain the Humidity by Following Even the Minute Details
For the first 18 days, maintain 40-50% humidity. The relative humidity in the incubator should be around 50-55%. Add water occasionally to keep the humidity level up to the mark and add more water on day 18 to augment the humidity level. During these last 3 days of incubation, humidity can be increased to about 65%.
Moisture in the incubator has to be provided via a pan of water under the egg tray. The water surface has to be double the size of the surface of the egg tray.
Keep adding water to the pan as needed. If a more humid environment is required, you could either increase the pan size or add a wet sponge. You can also adjust the humidity by increasing or decreasing ventilation.
If you don't have access to a wet-bulb thermometer or a hygrometer, you could also adjust humidity according to the size of the air cell in the egg.
A brilliant way of determining the correct level of required humidity is to candle the eggs on various stages of incubation. After candling inspection, you can make necessary adjustments to the humidity in the incubator. As a standard, an egg's weight must decrease by 12% during incubation.
5. Ventilate the Incubator
Eggshells are made of porous material and hence allow the exchange of oxygen and carbon dioxide. Incubators should accommodate holes for the inflow of fresh air so that the fetuses can get ample supply of oxygen for breathing.
As the embryos are growing, air vents are opened to let in more oxygen for fulfilling embryonic needs.
To ensure a proper supply of oxygen, you must prevent the eggs from overheating and ensure an adequate supply of oxygen.
In case there is a power outage, you'll have to act much more quickly especially if the room in which the incubator is placed is not well ventilated. One way to deal with this situation is to open the door of the incubator.
Also, the door of the incubator should not be opened unnecessarily.
6. The Turning Process
If you have an incubator that mimics the turning process of eggs done by chickens, then you have nothing to worry about. Incubators with this built-in mechanism, turn eggs by a few degrees after an hour or 2. However, if you're turning the eggs by hand, this needs to be done at least 3 times a day.
Turning the eggs is an essential part of the first 14 days of the incubation process and has to be continued for the last 3 days of incubation.
You can also mark the eggs on each side using different symbols and be sure to turn but only halfway so. If you turn them around completely, there is a danger that you would break the chalazae holding the yolk in its place.
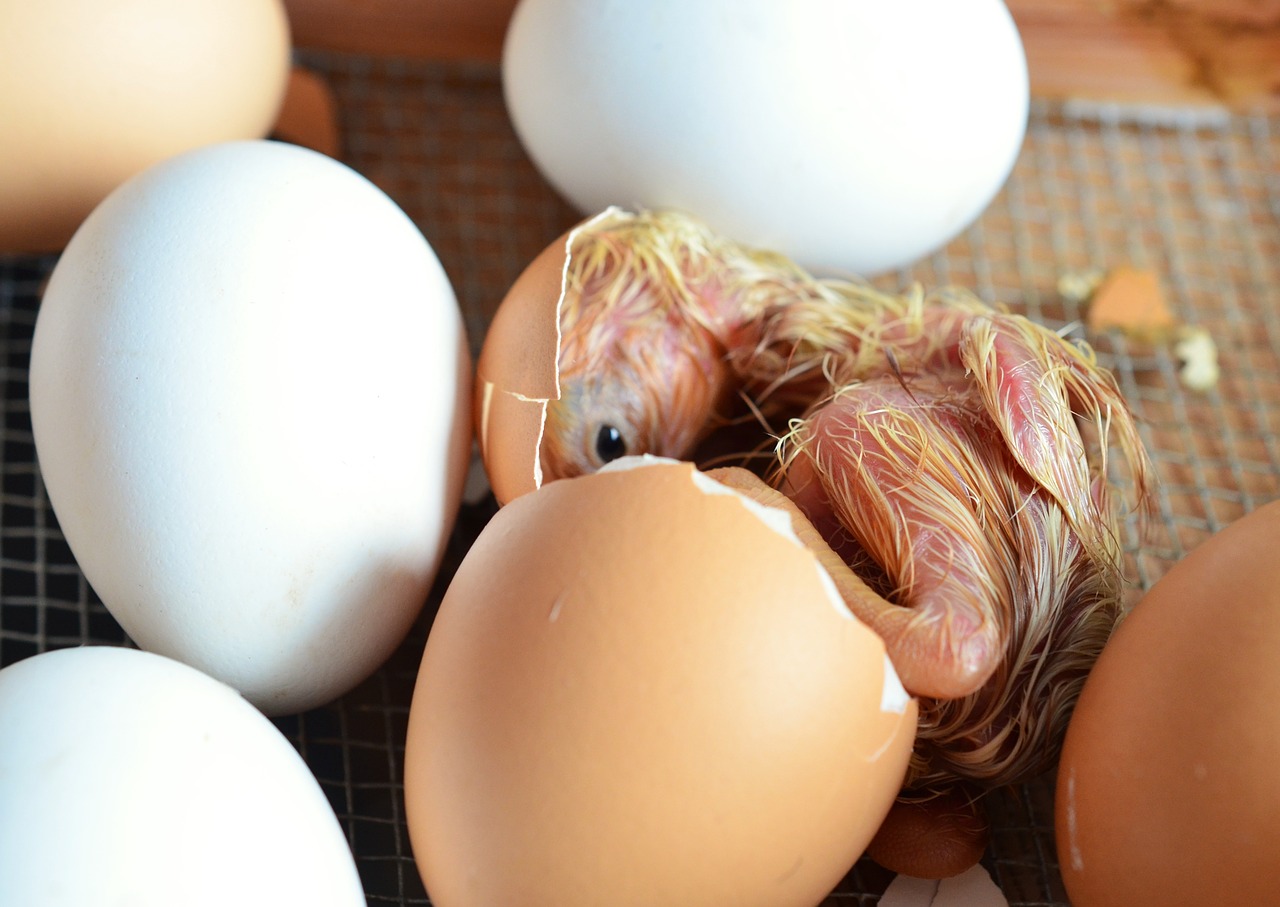
7. Hatching
To get ready for the much-awaited hatching, place a cheesecloth or crinoline layer on the screen under the eggs when you turn them just 3 days before they hatch. This will make the process of cleaning incubator after hatching, easier for you.
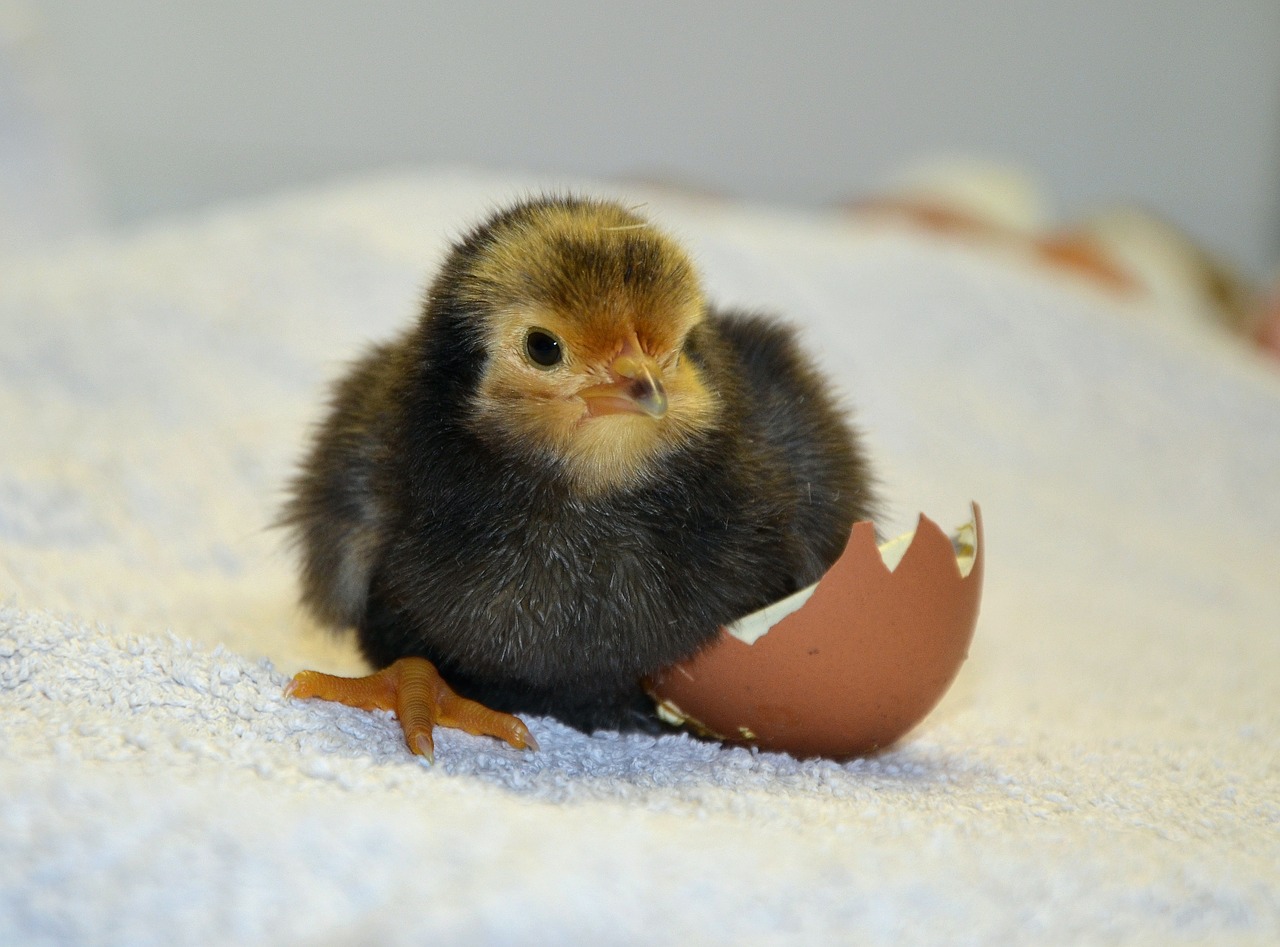
Many of the chicks complete their hatching process in 24 hours. Any chicks taking more time may not be a vigorous one and may be deformed. Once the chicks have dried completely, they can be removed from the incubator. When the majority of the chicks have hatched, you can lower the temperature of the incubator to around 95°F.
Supplies You Need Before Incubating the Eggs
To incubate the eggs, you'll need the following equipment and supplies:
1. Incubators
You can get homemade ones which are as simple as making do with Styrofoam coolers. For the heat source, you can make use of a light bulb or heating pad. And for adjusting humidity, you can place a pan of water with a sponge in it.
However, if you invest in a good quality incubator, the humidity and temperature controls would be automated – making your life easier!
2. Heat Lamp
Just like grown-up backyard chickens, baby chicks have a desperate need for heat. In fact, they require excessive care in terms of keeping them warm enough to survive their initial days. Otherwise, they can die. In natural settings, a hen will provide them heat with its body.
This continues for the first few weeks of the baby chick's lives. Since our incubation setting is far from a natural one, you'll have to compensate for it by bringing in a heat lamp. This can be a source of heat in the brooder.
Here are some of the specifics you should know before buying a heat lamp for your chicks:
– Types
Like brooders, you'll get plenty of variety in this area too. When it comes to heat lamps for your chick, you have options ranging from the common household light bulb to costly infrared heaters. However, you don't need to shell out your money on the most expensive heat lamps for your chicks.
For safety reasons, some backyard chicken owners recommend getting a radiant heat lamp. This is a safe alternative.
You also need to adjust the temperature according to the ages of the chicken. In certain circumstances, there may be no need for the heat lamp depending on the number of the hatchlings as well as room temperature. If there are more chicks, they'll keep each other warm and you may not need any heat lamp. You may also not need one if the weather is hot.
– The Bulb
The heat lamp bulb comes in various varieties too. Here are some of the varieties you can choose from:
- Incandescent Bulbs: They are known as the regular old household bulbs. Don't use anything less than a 75-watt bulb to start with, though, or you won't get enough heat
- Incandescent Floodlight: They are mainly meant for outdoor use; nonetheless they are a good option
- Halogen Bulbs: They are longer-lasting than incandescent bulbs, and consume less energy as compared to the heat provided
- Infrared Heat Lamp Bulb (red or white): They would cost you more, but they would also last for a longer time. Another thing about them is that they provide more heat as compared to regular bulbs while consuming less energy. According to some people, red light is suitable for chicks as it can not only prevent pecking but also does not disturb the sleep of the chicks
- Ceramic Bulb (or ceramic infrared heat emitter): They are a costlier option but they only emit heat and not light. As compared to other bulbs, they'll last much longer and will also use less energy. A 100-watt ceramic bulb can suffice for your needs
3. Egg Turners
Although incubators come with built-in systems for turning the eggs, you can also purchase standalone egg turners that perform the same duty and can be conveniently placed in a homemade incubator. If this isn't per your liking, you can always turn the eggs manually.
4. Thermometer
This along with hygrometer (used for measuring humidity) would be useful in keeping a check on the environment inside the incubator.
If you're opting for an incubator having these systems built-in, then you should go for a combination of both the equipment with an external display. With this system, you would be able to see the reading displayed on an external LED screen so you won't have to open the incubator again and again for taking readings. That's because opening the incubator door repeatedly can ruin the carefully maintained environment.
Even though chicks are new and small, the problems these newly hatched chicks bring with them, can sometimes be big and affect them. Keep an eye out for any such problem to nip it in the bud.
When a chick emerges and it appears with a deformity, you may begin to wonder what you could have done to prevent it. Don't worry. There are chances that around 1 out of 250 chicks will have some sort of deformity.
While you cannot do much to right the wrong if it's an abnormal chick, you can do some things to prevent any deformity in the first place.
If you find too many abnormalities in a batch of chicks, you may need to properly investigate the cause behind it such as possible mineral or vitamin deficiencies in the hens' diets.
It should also be remembered that while all malformed traits may not be inherited, some can be. Therefore, any deformed or malformed chicks should not be used for breeding.
Here are a few deformities that can be found in some of the baby chicks:
1. Beak Abnormalities
An abnormal beak such as a short beak, parrot beak, or having a crossed beak can be caused by a genetic trait. However, poor nutrition, exposure to pesticides, and exposure of hatching eggs to near-freezing temperatures are other possible causes and need to be considered for preventing this abnormality.
2. Belly-Button Problems
If the condition in the incubator isn't an ideal one in terms of humidity and temperature or any other factor, you'll have chicks suffering from belly button problems.
An unhealed navel can be the doorway for bacteria that can infect a chick. If you do have chicks with unhealed navels, make sure you're regular with their cleaning process in order to prevent any infection.
Low temperature during incubation can lead to navel with a string of dried tissue attached to it. High temperature during incubation, on the other hand, can lead to bloody navels or eggs with blood on them.
Poorly closed navels, another deformity, can be caused either by high humidity during incubation or low temperature during the last few days of the incubation process.
3. Missing/Small Eyes
High temperature during the process of incubation can lead to this deformity.
4. Pasty Vent
Chicks having diarrhea can have messy vents. Their vents can be surrounded by watery droppings and in certain cases, they can be clogged with poop. The buildup of the poop can lead to increased pressure and you can even see the rear end of the chick bulge due to it.
This condition is rare in chicks raised in a natural setting by a hen but is more commonly found in chicks hatched in an incubator.
Some of the possible causes for this problematic condition are too high or too low a temperature in addition to malnutrition and infections.
This can be taken care of by adjusting the temperature to 90-95°F.
Put the chick in clean warm water soaking its rear end in it. Gently remove the dried droppings and apply vegetable or mineral oil to the area. Avoid using any diaper cream as other chicks tend to peck it and this can be harmful. You can put the chicks safely back in the brooder or in a separate place where it might not be pecked by other chicks.
Fill the waterer with chlorinated water to avoid the spread of infection in your batch of chicks.
5. Exposed Brain
This too is caused by high temperature during the early stages of incubation.
6. Intestines Outside of Abdomen
If the eggs are exposed to extreme temperatures such as near-freezing temperatures or high temperatures during mid-incubation, this may lead to the aforementioned anomaly.
7. Crooked Parts
Crooked toes and crooked neck, both are caused by poor hen nutrition. However, this may also be a genetic trait.
8. Spraddled Legs
While many chick malformations cannot be rectified, this one can be.
If the chicks are allowed to hatch on too smooth a surface such as cardboard or newspaper, it can lead to the condition of spraddled legs.
Since the chick doesn't have a firm grip on the smooth floor, it slips. As a result, it has splayed legs. The chicks cannot walk properly without help but are otherwise healthy and sound.
To correct it, place the chick on a textured surface to lend it more grip on the floor. Some good options are wire mesh, shavings, and straw.
Using a bandage between the legs will bring the legs in the correct position. Cut the bandage in half vertically and wrap it around each leg above the foot.
Leave the bandage for 2 days. Meanwhile, the chick will get up and try moving on its own upon the encouragement of other chicks around it. After 2 days, check it and reapply for 2 more days if the chick is still not walking properly.
However, it's good to remember that not all of us are professional chicken keepers. Therefore, there's always a need for a vet. Even in this condition, you can take the baby chick to the vet.
Your Brooder
A brooder is a place where your chicks need to be placed after hatching. You can buy one from the market. If you want to save some money, though, or if you're a DIY person, then you could build one yourself too.
You should know about your brooder in detail because of its high importance for your chicks. Here are the things you would need for building a brooder:
- A box or container
- Bedding material
- Heat bulb or heat lamp
- A thermometer
- A feeder base
- A watering base
- Two jars for feeding and watering
- Chick starter feed
…and of course, the most important thing, the chicks!
The box or container you're getting can be of any material, be it wood, cardboard, or plastic. The only thing you need to keep in mind regarding it is that it should be a foot deep.
Some people even use a bathtub as a chicks' brooder! Then they line it with plastic, add pine shavings for the bedding, and voila, the brooder is ready!
Here are the specifications for of a brooder:
1. Size and Space
For the initial 4 weeks, chicks need a space of about ¼-square foot each. As they progress from the fourth week to the eighth week, their space requirement increases, and each chick would need a space of around ½-square foot.
You should also check that the chicks aren't getting overcrowded in the brooder and adjusting the space accordingly. If at any time they're on top of each other, arrange for more space immediately. Otherwise, they can smother each other to death.
2. Depth
The depth of the brooder can start from anywhere around a foot or 12-inches deep. This height can suffice for the brooder and will prevent any chicks from escaping it. It can suffice for many weeks to come.
However, if the brooder is not high enough, then your chicks might be able to escape it as by the age of 3 weeks they can fly out.
3. Location
You can usually keep the brooder in the house. However, after some time, the smell might become unbearable for the house inhabitants.
By this time, though, fortunately, the chicks have become old enough so they can be moved to a separate place in the chicken run. You can keep them indoors until they're old enough. Later, you can move them outside and place a heat lamp outdoors in a brooder.
If your brooder is placed outdoors, then take precaution that it's in a dry and draft-free location, otherwise, it can create problems for you. The cool air might seem harmless but it can actually chill the baby chicks and lead to their death.
4. Cover
Some people make use of hardware cloth on top of the brooder to prevent the chicks from flying out. It also prevents any cats, children, or other animals from pestering the chicks. However, if you do decide to go for the covering on the brooder, make sure that the brooder still has plenty of ventilation. Otherwise, the chicks can suffocate.
5. Bedding
Bedding is needed to be placed at the bottom of the brooder. And the bedding is quite necessary since this will prevent the chicks from sleeping or walking in their own filth. That's how this protective layer will maintain a healthy environment.
Not only this, but you should also ensure that the chicks are walking on a non-slippery surface. If the floor or surface is slippery and the chicks slip on it, they can develop splayed legs which are a crippling condition.
When it comes to flooring, hardware cloth (wire) isn't a good option for making the flooring of the brooder and you should not consider it. Firstly, it is pretty hard and chicks can get stuck on it. In addition, they can get injured on it. Secondly, this flooring can prevent the chicks from building immunity against coccidiosis. Hence, for these reasons, wire flooring isn't considered a good option.
There are several bedding options which are suitable and appropriate for baby chicks:
- Old rags
- Shredded paper
- Pine Shavings
- Dried grass clippings
- Chopped, dry leaves
- A strip of paper towels with newspapers' layered above it
- Peat
- Straw
- Sand
Shelf liner is a decent option to consider as it makes for thick and nice padding and it can be washed too. This can reduce your expenses quite a bit as you can use it over and over again.
Another great thing about it is that it doesn't get in the food and water of the chicks like wood chips. This material knows how to remain in its place and doesn't create troubles for the chick owners. If you go with paper towels, you'll end up using supplies of paper towels only to think there has to be a better solution to the predicament.
For this to work, you can cut newspapers and lay them below the cut shelf liner. It stays in its place.
If there's any spillage of water, it seeps in right through the holes of the shelf liner and gets absorbed by the newspaper. The chicks continue walking safely on the textured liner.
For your ease, you can have 2 identical cut pieces of shelf liner and wash and use them alternately. This cycle of usage will save you time.
This isn't the only way a shelf liner comes in handy, though. It's also extremely useful in the days of incubation.
As one seasoned chicken owner says, shelf liner is a great material to work with as it provides a textured surface. This means that the eggs will not roll around and they'll also not bang into each other if you wish to candle the eggs.
6. Waterer & Feeder
These are essentials equipment to have before the hatching of your chicks. Before you have the chicks all ready to hatch, make sure you have a proper container for watering and a feeder ready to start functioning. Not only this, but you'll also need some starter feed to kick start the diet schedule of the chicks.
In case you're buying chicks directly from someone instead of waiting for your hens' laid eggs to hatch, and you're expecting the chicks' arrival from mail order, then its better if you put a little sugar in the water to energize them quickly.
To make sugar water for the chicks, mix ½ cup table sugar into 1-quart of water for 1-2 days.
When you're filling the chicks' watering container, ensure that you use lukewarm water. Coldwater can harm baby chicks by chilling them. To be on the safe side, you can test the water on the inside of your wrist.
– The Waterer
The waterer can be bought at a farm supply store or online. However, you can also make your own waterer. You'll find plenty of tutorials online. You can also make one out of recycled materials. Watering nipples are another option to consider.
Your basic need is for something that won't spill, and that should be small enough so that the chicks cannot get in it and drown.
When your baby chicks arrive, dip their beaks into the water to show them where the water is. They don't necessarily have to drink, but this will let them know where they have to go for drinking water.
– The Feeder
This also can be purchased online or can be made by you.
Be sure that you keep the food and water containers filled at all times.
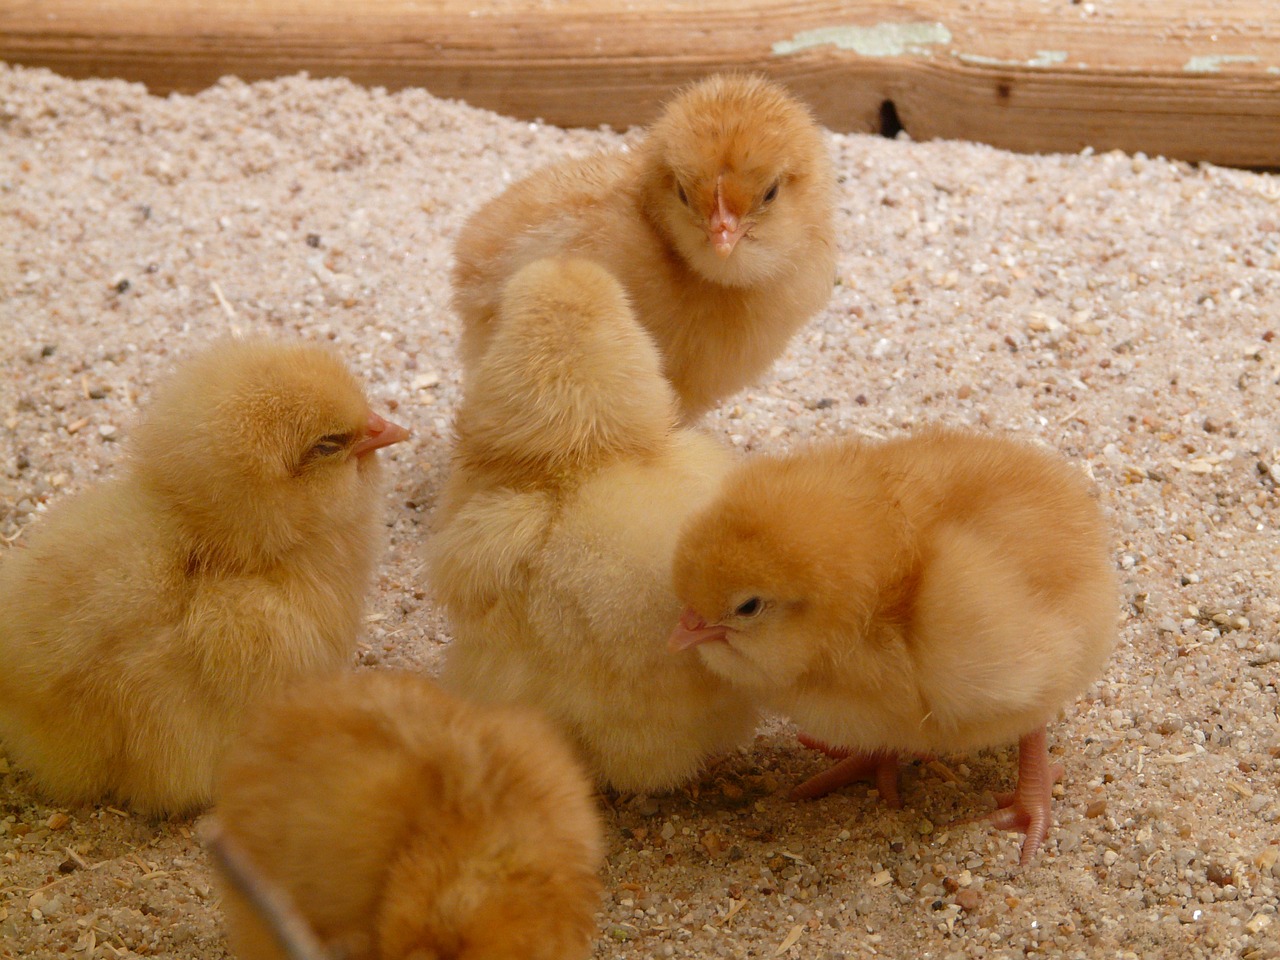
Raising the Chicks
1. How to Take Care of Them in Their Initial Days
Newly hatched chicks can stay alive for 3 more days on the yolk they absorbed in the hatching process. However, when you move these chicks to a brooder, make sure you have made the necessary arrangements for water and start offering them food after about a day.
2. How to Rear Chicks Until They're 8 Weeks Old
Modern machinery has made the task much easier. If you have a broody hen for this process, then good for you! If you do have a hen to make the job easier for you, you simply have to provide the chicks with water, food, and shelter. And you are done.
You need to place chick crumbs in a container that cannot be spilled or scratched out by the hen. Water should be in a container in which the chicks won't drown. You should also place the grain feed of the mother hen out of the reach of chicks. The mother hen can break these grain pieces into smaller bits for its chicks.
If you're hatching chicks with the help of an incubator, you'll need a heat lamp to keep them warm. A preferable option would be to get a ceramic bulb so they have access to heat and not light. This can also prevent feather pecking as the chicks will live in darkness and natural light.
Place the heat lamp in a draught free area with shavings under it, on the floor. You can also build a cardboard circle around it. This should be 18-inches in height.
The heat lamp should be turned on 2 days before the chicks are about to hatch and far from the shavings so that the temperature is around 102°F.
If the temperature is too high and chicks start feeling hot, they might run to the corner panting. Similarly, if the temperature is extreme on the other end and the chicks feel chilled, they'll huddle together in the middle, making loud noises. Ideally, you should have a small, empty circle under the lamp. After drying the newly hatched chicks and dipping their beaks in the water, you can place them under the lamp.
3. How to Rear Chicks When They're Older Than 8 Weeks
There is a debate about whether chicks should be given perches or not. As long as the perches are 2-inches in width, there will be no problem of bent breastbones formed due to the perches. Lighter breeds prefer perches.
The rearing house for chicks should be large enough to accommodate the waterer, feeder, as well as ample space in case of bad weather. If you're using an adult chickens' coop for your chicks, block the nest boxes with cardboard as this can form a bad habit of roosting in nest boxes.
Keep a watchful eye on the chicks during their development phase. Those chicks which have some defect should be removed from the main flock to give other chicks more space and ample clean area for growing satisfactorily.
You should also take precautionary measures by using cardboard to round off corners when you're moving the flock to new houses. This has to be done in order to stop them from huddling in corners and smothering each other.
Keep giving the chicks the best quality feed. This should include a feed from reputed sources. Avoid scarps as they can upset the balanced ration. Chick crumbs with 20-22% protein content, should be fed. Turkey starter crumbs are another good option.
As chicks reach the age of 16 weeks, you can feed them a layers' ration consisting of 16% protein.
Making your Chicks Members of the Flock
There are various stages of introducing the new members to your flock. Let's have a look at each one of these:
1. Quarantine the New Chicks
The new members may carry some diseases. That's why it's important to ensure that they don't bring in these infections and diseases to the existing flock. This has to be done for the first 4 weeks. Even if you're buying adult chickens from somewhere, it's always recommended to quarantine them as the stress of moving to a new place can weaken their immunity power and make them fall ill.
In the separate, quarantined coop, inspect the chicks to see for signs of any mites or lice, dull comb, blocked nostrils, scaly legs, or fluid coming from their eyes.
The quarantine can last from 7-31 days. The longer you keep the chicks in the quarantine phase, the safer it is for your existing flock.
2. Introduce New Chicks Slowly
Even if your chicks are healthy and don't need quarantine, don't be in a haste to introduce them to the flock. Increasing the size of the flock, abruptly, will only result in fighting and trouble.
Place the chicks in such a way that the existing flock can see them but not touch them. This way, your flock will get familiar with them. This can be done by placing their pens next to each other.
This period can last about a week.
3. Let Them Free Range
You could let the new chicks free range and then let your flock enter in for free-ranging. You could also place the new chicks in the pen first and then let the flock come in.
There will be some jostling and scraps as the chickens establish a new pecking order. This is nothing to worry about. However, if you see any chicks bleeding or some chickens looking injured, intervene, and stop the jostling.
You need to do the introductions part just once. However, if all doesn't go well, you might have to do it 3-4 times until all the chickens are well-acquainted with each and everyone and settled down!
Conclusion
Hatching adorable little chicks from eggs or even allowing a broody hen to do the work for you, is a worthwhile experience. Not only will you grow your flock, but appreciate the cycle of life, whether it started with the egg or the chicken.
Was this article helpful?
Yes No
How to Take Care of a Chicken Egg How to Make a Baby Chicken From an Egg
Source: https://morningchores.com/hatching-chicken-eggs/
0 Response to "How to Take Care of a Chicken Egg How to Make a Baby Chicken From an Egg"
Post a Comment